Voices At The Table

Miranda-and-Anna.jpg

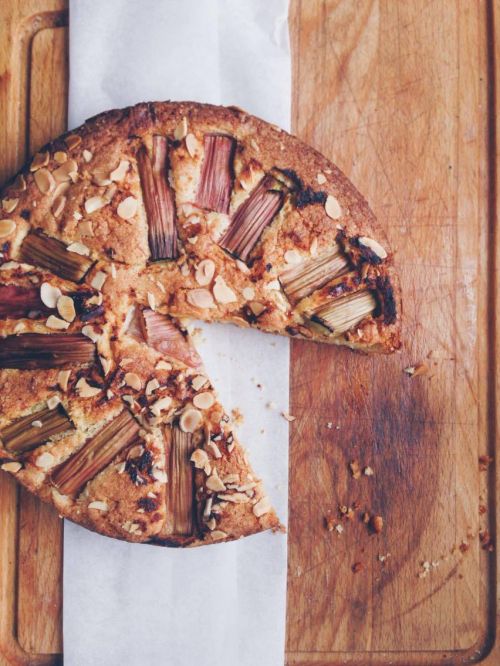
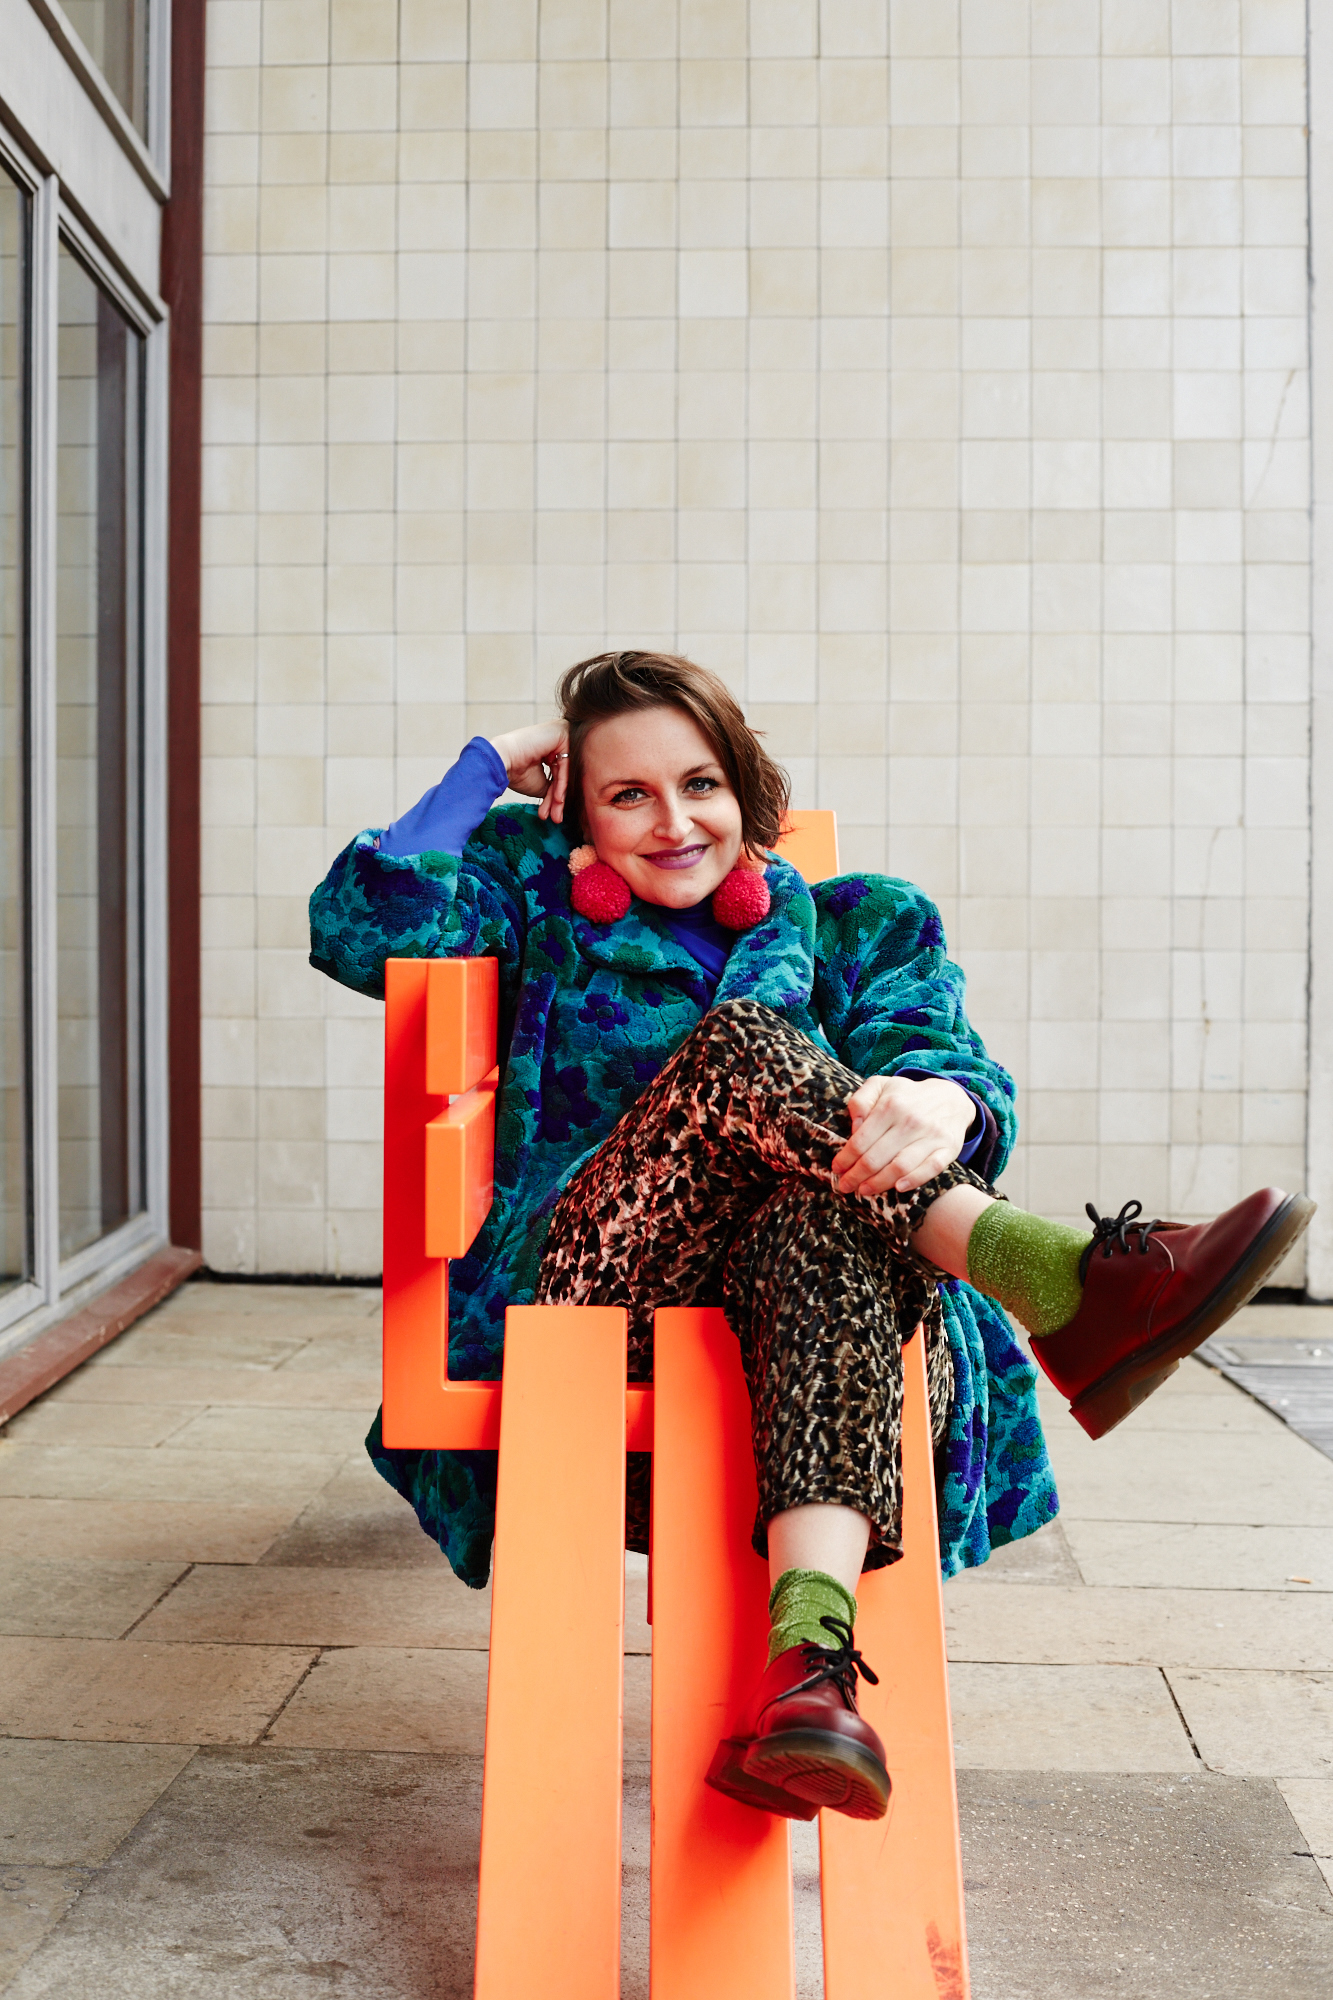
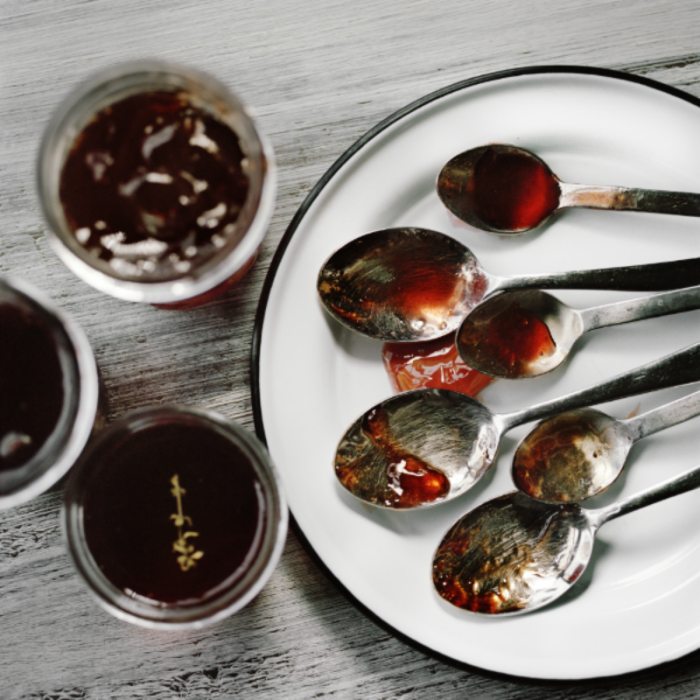
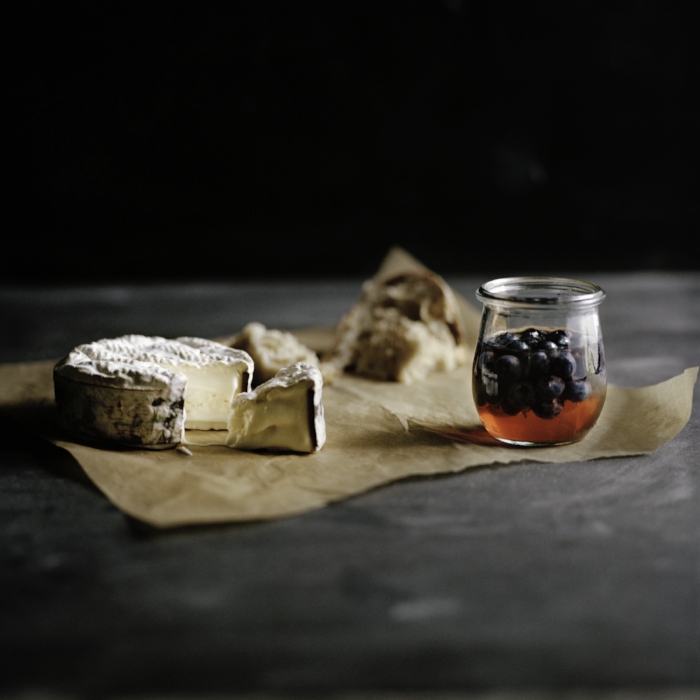
Food, unlike anything else, has a way of bringing people together. It’s the thread that connects our days and ties us to our identities. Everyone can map their lives through food, from childhood recollections to the first thing they ever made for themselves. It allows for a diverse range of stories and memories. Two women making sure all of these stories and voices are heard and listened to are Miranda York and Anna Suling Masing.

Miranda, a freelance journalist, founded TOAST festival in 2013, which led into an annual food magazine. This, in turn, became what At The Table is today, an illustrated magazine that explores British food culture, featuring essays from food writers, novelists and poets. Anna Suling Masing, a writer, poet and academic, and Miranda co-curate the popular event series Voices At The Table.

Their events combine food, literature, and performance in an intimate evenings around London. We sat down with Anna and Miranda to chat about the importance of new voices, women’s writing and of course, why it's important to talk about food. 

Miranda: When we started we didn’t really think about beyond the first event, we just wanted to bring interesting people together to talk and think about food and interesting ideas like women in food or the future of meat. 

Anna: We’d known each other for years and then I wrote a poem for an issue of At The Table. I ran a theatre company for 7 years, moved into food writing and journalism and then did a PhD in storytelling, with food and identity as the biggest aspects. Miranda and I really connected over on food and what it really means.

Miranda: We really wanted to find new ways to tell these stories. Anna invited me to a play where people were cooking on stage, which I found so interesting. I wanted a way to bring the stories in the magazine into life in an event form, to bring lots of different people together from different worlds, industries and backgrounds together to talk about food in a really relaxed way. It’s all part of the oral tradition of storytelling. Everyone gets up and tells a story. It could be from their novel, from their cookbook or it could be something original that we have commissioned for the event or even someone else's writing that they really have a connection with. It’s like a literary food salon.

Anna: The big thing that we’re both so passionate about across all of our work is being a platform for new voices. The food world needs to be really diverse, the writing world needs to be really diverse. We always commission one or two new writers and pay and financially support new work. That's always the biggest feedback from events, that people find new writers to connect with.  

Miranda: Someone might buy a ticket to come and see a big name but they’ll always leave loving a new voice that we’ve featured. I love that people come and can connect with something that they might not usually experience. Food is what connects everything but it's  much more than food – it’s peoples memories, stories and history. Anyone can talk about food, it’s a great leveller for people to connect.

Anna: Food is also complicated and difficult, which makes it a really important thing to talk about. It’s not all joy and light, it’s complex. If you grew up without a lot of access to food, it affects you. Food is political. It’s gendered. It is really valuable to address it and to give people a space to talk about these things.

Miranda: We just recorded a pilot podcast because obviously events have limits on numbers and we want as many people to be able to hear these incredible stories. We’re so excited to get the stories out there. 

The next Voices at the Table takes place at The Coach London on 25 June. Novelist Sarah Winman, historian and screenwriter Alex von Tunzelmann, actor Kevin Shen and debut novelist Sophie Mackintosh will all be reading, while dining on a three course meal from chef Henry Harris. Visit At the Table for information and more essays on food, culture and why we eat. 


Laura Dockrill's power fresh green pesto

Portrait: Liz Seabrook

Portrait: Liz Seabrook

“Look at that! You get to pour your own chocolate in here.” Laura Dockrill is marvelling as she spirals her jug of warm, dark drinking chocolate into the awaiting mug of frothy milk. “It’s so good!” For a moment, it feels like we’re in Laura’s new young adult book, Big Bones, whose heroine, Bluebell, just loves her food: whether crumpets leaking with butter, salty caramel slathered millionaires shortbread or chips so vinegary that they make your nose hairs shrivel. 

In our early spring issue, we had the pleasure of speaking to writer Laura Dockrill. Her new book Big Bones – out today - celebrates the pleasure in eating. As Laura says, “There’s no such thing as a perfect body but there can be a perfect meal and you can enjoy that”. Needless to say, it made the entire team very hungry indeed. Laura was kind enough to share her favourite recipe for pesto. 

9781471406928.jpg

Laura Dockrill's fresh green pesto recipe

Big Bones is not just a love letter to food and the body; it is also to show how rewarding it is to cook and eat. It doesn’t have to be hard or fussy or posh or embarrassing to cook. I want to inspire people, kids, to enjoy food. And so the recipe I’ve chosen to share is simple, quick, easy to make, fragrant, vibrant and versatile and can turn any cheap carby comforting canvas into a wholesome meal that looks and tastes impressive. It’s the way I like to cook. Messy and natural. And if you are able to grab, rip, squeeze, pinch and smush you can make this without even touching a flame or a knob of the oven!

I made this for my partner Hugo, after a lot of beer, smothered over pasta. He said, “oh my god, this is the best meal I’ve ever had.” (No, it was not the beer talking) and he is not one tincy bit interested in cooking, but this is something he can now whizz up himself in under a minute and saves the day every time.

It lasts and it’s so much better and tastier and cheaper and vividly GREENER than the jarred stuff.

FRESH GREEN PESTO

You will need:

one massive handful of basil stalks and everything (or I just use one of those whole bags you can buy individually from the supermarket)

big glug of olive oil the better the olive oil the better it will taste

parmesan the best thing about this is because the pesto gets smushed up you don’t have to fiddle around with the small fiddly bit of the grater!

juice of a whole lemon

sea salt and pepper

*optional toasted pine nuts


All you have to do is simply bring all of this together. Use a Nutri Bullet or blender if you have one for a 30 second smooth sauce or you could bash it up in the pestle and mortar or hand mix for something chunkier.

The thing I love about this is you can add as you go, more lemon for acidity, no pine nuts for pasta for something smoother, add nibs of toasted walnuts or pecans for a salad, a handful of spinach for extra green and goodness and chilli flakes work well too.

Then stir into hot pasta, smear over hot roast potatoes, drizzle over a green salad, slather over bread for a toasted cheese sandwich. A great invention are those Jus-Rol puff pastry sheets, you can smear this homemade wonder over a sheet of this stuff and accessorize with olives, sun dried tomato, artichoke, mozzarella for an impressive pizza/tart or roll into little swirls for a snack that makes you look SO FANCY! You could add to yoghurt or houmous for dipping (which is also super easy to make), top over roasted vegetables or just stuff it in the corner of a lunch box and visit with bread or whatever’s in there like a little pesto watering hole.


Big Bones by Laura Dockrill is published by Hot Key books and is out today. And pick up a copy of our early spring issue to read the full interview with Laura. 


What we're eating: Pancakes with blueberries

Photos: Sophie Davidson

Photos: Sophie Davidson

In our early spring issue, we asked three women who know a lot about food to share their cupboard comfort recipes. And, given that today is Shrove Tuesday, we thought you might especially enjoy Ravneet Gill's recipe for pancakes with blueberries...

"Every time I have a day off, my joy is making pancakes. It’s repetitive, it’s easy, and the process of making them is so calming after working as a chef in a busy kitchen. I always have the ingredients for pancakes stored away in my cupboard, and I always have tons of maple syrup ready to drench my pancakes in. I love eating them with blueberries that I just cook down with a little bit of sugar and lemon until they’re soft."

You will need: 

1 cup plain flour

2 tbsp caster sugar

1 tsp baking powder

1/2 tsp bicarbonate of soda

1/2 tsp fine salt

2 large eggs

3/4 cup of whole milk

1 cup of yoghurt

50g butter, melted

1 tsp vanilla


Method

1 Place all dry ingredients into a bowl, stir to combine, crack the eggs into the middle and whisk in with splashes of the milk until a batter forms.

2 Whisk in the yoghurt, pour in the melted butter and vanilla.

3 Allow to sit for half an hour before spooning into a buttered pan and cooking on each side until golden. Serve with maple syrup, blueberries and dust with icing sugar.

edit-0718 copy.jpg


Ravneet Gill does magic things with sugar and flour. One of our favourite pastry chefs, she’s worked in some of the capital's finest kitchens. Now she creates incredible desserts at Llewelyn's in south London. 

See more cupboard companions in issue 41, the early spring issue of Oh Comely, available to buy now

What we're eating: Pepparkakor

Christmas biscuits.jpg

"The very nature of rituals means they also serve to remind us of things that are different from years that have gone before. Of people who are no longer seated around the same table, of fallings-out, of break-ups, of those who have passed away. The season is inescapable, and so we have no choice but to adapt. Make new rituals, or embrace the old ones as best we can."

Moving from eating Christmas pudding poolside in Australia, Kate Young writes about learning to embrace England's snowy skies, long Boxing Days walks and new festive traditions in our midwinter issue. Start one of your own by trying her recipe for pepparkakor, a spiced biscuit that's great to eat with cheese. 

Pepparkakor

Makes at least 60

You need:

  • 50ml water
  • 2tbsp golden syrup 
  • 80g light brown sugar
  • 20g dark brown sugar 
  • 1tsp ground ginger 
  • 1tsp ground cinnamon
  • Pinch ground cloves
  • 75g unsalted butter, cut into cubes
  • 1tsp bicarbonate of soda 
  • 220g plain flour

1 Bring the water, syrup, sugars and spices to the boil in a small saucepan over a low heat. Pour them over the butter into a mixing bowl and leave for a few minutes to cool. The butter should have completely melted by this stage.

2 Sieve the bicarbonate of soda and flour into the mixture. Stir to combine and bring together in a dough. Leave the bowl in the fridge for a couple of hours, or preferably overnight.

3 Preheat the oven to 200ºC. Flour your work surface  and roll the dough out as thinly as you can – a couple of millimetres thick is about right. Line your baking trays. Cut shapes out of the dough, with cookie cutters of your choice, and arrange them on the tray, leaving a little space for them to spread slightly.

4 Transfer each batch to the oven and bake for five minutes, until slightly crisp around the edges. Leave to cool on the tray for five minutes and then completely on the wire rack. The biscuits should be crisp around the edges. Serve plain or with cheese – they’re lovely with Swedish cheese, or good cheddar or Stilton.


Read Kate's piece about changing Christmas traditions in the midwinter issue of Oh Comely, out now. 

Recipe Friday: Savoury Cheesecake with Roasted Pickled Shallots

We've had a fair few healthy options lately for Recipe Friday and now that our polo necks and opaque black tights are back out of the wardrobe, it's time for something truly hearty, extra tasty and somehow warming whether you eat it hot or cold. 

Everyone loves cheesecake. But do you know what's even better? Cheese-y cheesecake. A really herby, cheddar-y, savoury version with an oatcake crust. Essentially, a cheese pie. You'll want those roasted pickled shallots, or a spicy chutney, to cut through the creaminess. It's also worth making this a few hours in advance as it will set and let the flavours develop nicely if you leave time to chill it after baking. This keeps for a good four days in the fridge if it isn't gobbled up in the first sitting. 

savoury cheesecake.jpg

You will need:

200g fine-milled oatcakes, crushed up
125g butter, melted
350g cream cheese
150g double cream
2 eggs
100g cheddar cheese, cut into tiny squares
a handful of finely chopped chives
a sprinkling of thyme
a few pickled shallots
olive oil

1 Pre-heat your oven to 170 degrees C.

2 Give the oatcakes a good whack in a freezer bag with a rolling pin until they're finely crushed, pop them in a bowl and then pour over your melted butter. Give it a good stir.

3 Press the oatcake mixture into a small non-stick bread tin and shape it up the sides with a teaspoon. Chill for 30 minutes.

4 While that's chilling, make your filling. Whisk the cream cheese, double cream and eggs together until silky and add a third of your diced cheese and chives, a sprinkle of thyme and a good twist of salt and pepper.

5 Scatter your remaining cheese cubes on top and place in the oven for 40 minutes.

6 Take the savoury cheesecake out of the oven when it's still a bit wobbly in the middle, but browned on top.

7 Leave to cool. Once cool, chill in the fridge.

8 When you're ready to eat a slice, roast some pickled shallots in the oven first for around half an hour. Place them in a greaseproof tin with olive oil and remove when they've started to caramelise and go crisp at the edges.

9 Serve a generous slab of cheesecake hot or cold with the roasted shallots and a green salad with traffic-light tomatoes. 

Recipe Friday: Blueberry Porridge

For the next three weeks, we have some grainy goodness from Alex Hely-Hutchinson of London's 26 Grains restaurant to share, and we're kicking off with this easy tasty porridge dish, served with seasonal blueberries. A great one to master as we head into autumn. Alex says, "When we opened the shop in June 2015, this blueberry porridge was one of the first on the menu and it was an instant hit. It’s a firm favourite when the berry season is underway. There is something so delicious when blueberries and maple come together. The sweet and sour berry and dark treacle syrup paired with creamy, salted oats makes this such a moreish breakfast."


Alex Hely-Hutchinson's blueberry porridge.

Alex Hely-Hutchinson's blueberry porridge.

Serves 2

For the porridge:

100g rolled oats, soaked in 250ml water for at least 30 minutes
250ml unsweetened almond milk
¼ teaspoon sea salt
 

For the blueberry compote:

250g blueberries
1 tablespoon maple syrup
Squeeze of lemon juice

To serve:

2 tablespoons mixed seeds, such as flaxseeds, pumpkin seeds, sunflower seeds
A few strawberries, sliced
2 tablespoons coconut flakes
2 tablespoons Almond Butter from a jar or homemade
2 tablespoons amaranth (optional)

First make the blueberry compote: place the blueberries, maple syrup and lemon juice into a small pan with 1 tablespoon of water and allow to come to the boil. Once bubbling, take it off the heat and set aside.

Place the porridge ingredients, including the water the oats have been soaked in, into a pan over a medium heat and cook for 3–4 minutes, stirring continuously, until the oats have come together.

Spoon into 2 bowls and add the toppings in this order: a tablespoon of blueberries in a line down the middle with a pool of juice around the edge, then the seeds, strawberry slices, coconut flakes, almond butter and amaranth, if using.

26 Grains by Alex Hely-Hutchinson is published by Square Peg at £20, and is out now.

26 Grains by Alex Hely-Hutchinson is published by Square Peg at £20, and is out now.


Recipe Friday: Cornbread with Chipotle Butter

We like to find you some unusual treats to share with friends at the weekend and our pals at Caravan, London have suggested this slightly spicy American-inspired snack. 

Caravan's Cornbread and Chipotle Butter

Caravan's Cornbread and Chipotle Butter

Serves 4

For the cornbread:

400ml milk
3 eggs
60g melted butter
200g corn
½ bunch of spring onions (chopped)
1tsp baking powder
1tsp caster sugar
1tsp table salt
1 cup polenta
½ cup bread flour

Preheat oven to 200c.

Mix all wet ingredients including the corn and the spring onions in a large bowl.

Mix all the dry ingredients together in another bowl.

Combine the wet and dry ingredients and promptly pour into a paper-lined loaf tin and place immediately in the oven. Bake for 30mins. Cool for 5 minutes then turn out of the tin onto a cooling rack.

Once the loaf is cool, trim the ends and slice the loaf into 8 equal sized slices (2 slices each).

The cornbread is now ready for the next step.

For the chipotle butter:

250g soft butter
pinch salt
½tsp minced chipotle
juice of ½ a lime
¼ cup chopped coriander

Mix all ingredients together.

Serve while soft. The excess will keep in the fridge for up to 1 week.

Next steps

Heat a large pan with a dash of vegetable oil.

Carefully place the slices of cornbread in the pan and fry until golden brown.

Flip the slices and fry till brown on both sides, repeat process until all slices are cooked.

To Serve

Place the fried slices of corn bread on a plate and top with a generous dollop of chipotle butter.

Finally, garnish with some picked coriander leaves, a wedge of lime and some slice spring onions.

Thanks to Miles Kirby, Executive Head Chef and Co-founder of Caravan restaurants.

Recipe Friday: Gluten-free banana bread

We're all for eating whatever you like, but if you are sensitive to gluten, or fancy mixing the classic banana-rescue recipe up a bit, this one's just for you. This foodie twist comes from the kitchen of our fashion ed, Charlotte Melling. 

You'll need:

2 bananas
210g coconut oil
240g ground almonds
2 tsp baking powder
1 tsp cinnamon
2 eggs
a pinch of salt
maple syrup (or other sweet drizzle like Agar, Honey or Syrup) 

Preheat your oven to 200C and line a square baking tray with greaseproof paper.

Peel the bananas and whizz in a blender with the eggs.

In a separate bowl mix all the dry ingredients. 

Over a low heat, gently melt the coconut oil before adding to the dry mix.

Combine both mixtures.

Bake for 20 minutes or so (depending on the thickness of your cake)

Once baked, prick some holes in the cake and pour over the maple syrup – as much or as little as you like. 

Bake in the oven for five more minutes.

Leave to cool, then cut up and serve.

This recipe originally appeared in our Bananarama round-up in Oh Comely issue 31, available to buy here.

Recipe Friday: Gujarati Dal with Peanuts and Star Anise

In our second instalment of flavourful recipes from Meera Sodha, who features in issue 31, we bring you Gujarati Dal, a weekend dish you can take your time over.

Meera says: "This dal is my and every other Gujarati’s taste of home. One spoonful and I am transported. It has a more complex taste than most dals due to the subtle jabs of star anise, curry leaves and lemon, all rounded off with the sweetness of honey. Because of the time it takes to soak and cook toor lentils, this is more of a weekend dish in our house, although a daily staple across Gujarat."

Serves 4 as part of a main course 

300g yellow toor lentils
2 star anise
Rapeseed oil
½ teaspoon mustard seeds

¾ teaspoon cumin seeds
4 whole cloves
1 green finger chilli, slit lengthways
2 sprigs of fresh curry leaves
3 large ripe tomatoes, chopped
½ teaspoon ground turmeric
1⅓ teaspoons salt
2½ teaspoons runny honey
1½ tablespoons lemon juice
30g red-skinned peanuts, crushed

Soak the toor lentils in cold water overnight, or in warm water for an hour before cooking. When soaked, wash the lentils in a few changes of cold water until the water runs clear, then place in a saucepan and cover with 4cm of cold water. Add the star anise and set to boil over a medium heat. The lentils will take around an hour to become tender (so you can crush them easily with the back of a spoon), and you may need to remove the scum that forms, using a large spoon. While the lentils cook, you can prepare the tempering. 

Put 2 tablespoons of oil into a frying pan over a medium heat. When hot, add the mustard seeds, cumin seeds, cloves, green chilli and 6 curry leaves. Stir-fry for 2 to 3 minutes, until you can smell the spices, then add the tomatoes. Cook for around 5 minutes, until the tomatoes become soft and paste-like, then add the turmeric, salt, honey and lemon juice. Cook for a couple of minutes, then turn off the heat. 

When the lentils are cooked, whisk them to thicken, then add the tempering. The mixture will be quite thick, and Gujarati Dal is normally thin, so add at least 200ml of hot water (or as you prefer), then simmer for a further 15 minutes. Check that the salt, lemon, chilli and honey are to your liking, then take off the heat. 

Put another tablespoon of oil into a separate frying pan and, when hot, add a sprig of curry leaves and the crushed nuts. Fry until the curry leaves crisp up and the peanuts brown, then take off the heat. Transfer the dal to a serving dish and scatter over the curry leaves and the peanuts. Serve with steamed basmati rice, a green leafy vegetable curry like the savoy cabbage and a side of yoghurt and pickles. 

Meera's book, Fresh India, is out now.

Recipe Friday: Rainbow Chard Sag Aloo

Rainbows: hope and pride and promises, a symbol of all good things. We're pleased to share a few recipes from issue 31's 'Things and People' subject, Meera Sodha (flick to page 48 of your issue) on Recipe Friday over the next few weeks, starting with this beauty. 

We hope you'll enjoy cooking it, take pride in your flavoursome dinner and we promise it's tasty. Let's go.

Meera Sodha's rainbow chard sag aloo, making the Oh Comely office hungry.

Meera Sodha's rainbow chard sag aloo, making the Oh Comely office hungry.

Meera says: "I’ll never forget my mum’s head-turning squeal when she saw a bag of Desiree potatoes marked ‘grown in Lincolnshire’ in the aisle of a London supermarket. She’s evangelical about their butteriness, and proud of the fact they’re grown near our family home, so this dish, which uses a classic Gujarati spicing of cumin, coriander, turmeric and chilli, appears regularly on the Sodha family table."

Serves 2 to 3 as a main course 

400g rainbow or Swiss chard
3 tablespoons rapeseed oil
1 teaspoon black mustard seeds
2 medium brown onions, sliced
600g Desiree potatoes
3cm ginger, peeled and grated
4 cloves of garlic, crushed
400g ripe tomatoes, cut into wedges
1⅓ teaspoons chilli powder
⅓ teaspoon ground cumin
⅓ teaspoon ground coriander
½ teaspoon ground turmeric
1¼ teaspoons salt

To prepare the chard, cut the stems from the leaves. Cut the stems into 4cm pieces and slice the leaves into 4cm strips. 

Put the oil into a large lidded frying pan and, when hot, add the mustard seeds. When they pop, add the onions and cook for 12 to 15 minutes, until soft and golden brown. In the meantime, peel the potatoes and cut into 2cm cubes. When the onions are ready, add the ginger and garlic to the pan and cook for a couple of minutes, then add the potatoes and 200ml of water. Cover and cook for 10 minutes. 

Add the tomatoes and the chard stalks, cover and cook for a further 5 minutes, or until the chard stalks are soft. Add the chilli, cumin, coriander, turmeric and salt and stir gently. Finally, add the chard leaves, coat with the mixture and pop the lid back on for a final 2 to 3 minutes, until the leaves have wilted. 

Serve with hot chapattis or rice, yoghurt and a little pickle. 

Meera's new book, Fresh India, is out now.

Recipe Friday: Zombie cocktail

In issue 31, we investigate the history of cocktails in all their weird and wonderful glory. Whether you're drinking to remember or to forget this weekend, we thought you'd appreciate a lesson in creating the particularly tropical, highly infectious, Zombie.   

Illustrations by Padhraic Mulholland for issue 31 of  Oh Comely . The 'Zombie' is third from the left

Illustrations by Padhraic Mulholland for issue 31 of Oh Comely. The 'Zombie' is third from the left

Cocktails – with their numerous ingredients and complicated preparation techniques – are seen as drinks for special occasions; perhaps if beer came with a little umbrella or a sparkler we might think of it the same way too. Novelty drinking places emphasis on presentation – at its most evocative, cheesy and wonderful in the Tiki Bars of the pre- and postwar period. Serving rum-based drinks like Zombies (also known, thrillingly, as “skull-punchers”) in coconuts and pineapples, these romanticised impressions of Polynesian culture understood that a good cocktail feels like the first day of a holiday.

You can serve a Zombie in a Hurricane glass too, or a tumbler, we're not fussy.

Serves 1

25ml White rum
25ml Golden rum
25ml Dark rum
25ml Apricot brandy
25ml Pineapple juice
A dash of 151-proof rum
Squeeze of lime
Garnished with a cocktail cherry

Mix all ingredients together apart from the 151 in a shaker with ice. Pour into the glass and top with the 151. You can also set this drink on fire if you're feeling particularly exasperated/celebratory.

Find more cocktail inspiration in issue 31 of Oh Comely, out now.

Recipe Friday: Gooseberry Jelly

This jelly is a beautiful pink colour and goes really well on toast. And it's savoury enough to go with pork and poultry dishes. It's also delicious with gooey, soft cheeses, as the slight sharpness of the jelly cuts through the richness of the cheese.

Makes approx. 2 litres

1.3kg gooseberries, not too ripe
850ml water
Sugar as required

Preheat the oven to 160C/ 325F/Gas mark 3 and get your sterilised jars and lids warming on a baking sheet or tray.

Heat the gooseberries and water in a covered pan over a medium heat for about 20 minutes until the gooseberries are completely soft and pulpy.

Strain the fruit into a scalded jelly bag or muslin-lined sieve and leave to drain overnight or for a few hours. Do not squeeze the bag or your jelly will be cloudy.

When fully drained take the juice and measure it to calculate how much sugar you need. You will need 800g (1¾lb) of sugar per 1 litre (2 US pints) of juice. Put the juice in a wide heavy-bottomed pan.

Warm the sugar in the oven for 5 minutes. Once warm, add to the juice and mix to blend. Continue to stir over a medium heat until the sugar has fully dissolved. Bring to a boil and boil rapidly, stirring occasionally until setting point has been reached (start testing after about 10 minutes). Once setting point has been reached remove from the heat, fill the jars, wipe the rims and seal with lids.

Find more great recipes in Do Preserve by the Do Book Co.

Recipe Friday: Pickled Blueberries

The addition of cinnamon in this pickle is inspired by the classic all-American blueberry pie. It's perfect in a brie sandwich or simply served alongside cold meats and cheese. Blackberries have a sharp flavour when pickled and may require a little more sugar according to taste.

Makes 1 jar

100ml white wine vinegar
50ml water
50g sugar
¼ tsp salt
150g blueberries
1 small cinnamon stick


In a small saucepan heat the vinegar, water, sugar and salt until all the granules have dissolved. Set the vinegar mixture aside and allow to cool.

Put the blueberries and cinnamon stick into a sterile jar and pour the vinegar mixture over. Cover and leave in the fridge for a day before using. The pickles intensify in flavour the longer they are kept. 

Find more great recipes in Do Preserve by the Do Book Co.

Spinach and spelt gnocchi with lemony wild garlic pesto

words Liz Seabrook

30th April 2016


After a particularly fruitful foraging* session last week, our lifestyle editor found herself with a fridge full of wild garlic and one craving: pesto. But what to go with it? Here’s a homemade twist of the student classic. Remember, wild garlic has a quite a short season, so if you want to try this you’ll have to track some down by the end of May. 

You Will Need
For the pesto

1 wild garlic large bunch washed

1 small bunch curly parsley washed

60g of pine nuts

60g of Parmesan

150ml of olive oil

A lemon

salt

black pepper

For the gnocchi you will need:
200g spinach

150g ricotta

100g spelt or wholemeal flour

large handful parsley, some set aside for garnish

2 medium eggs

50 g Parmesan, grated, plus shavings to serve

Knob of butter

How to:

One. First make the pesto. Put all the ingredients asides from the olive oil into a food processor and blitz them. Slowly add the olive oil until it resembles what you’d find in your old faithful jar of shop bought pesto.

Two. Next get cracking with your gnocchi. Start by placing all the spinach in a colander and pouring boiling water over it to wilt it, then run the cold tap over it to cool it down. Next use your hands to squeeze the excess water from it - don’t be shy, you won’t hurt it.

Three. Place all of the ingredients into your food processor and blitz until combined. If you were shy with your spinach, you may need add more flour to soak up the water and make the mixture more doughy. Add it slowly mixing by hand until you feel happy (or too worried to add more).

Four. Put your mixture in the fridge to cool for 30 minutes.

Five. Bring a well filled pan of salted water to the boil and retrieve your mixture from the fridge. Now, there are two ways to get shape your gnocchi; if you’re a dab hand with the chef-y two teaspoon technique use that, if not, pull off a bit and carefully roll between your palms. It’ll be quite sticky and messy, but hey, who minds a bit of mess?! You’ll need to cook them in batches, so it’s easiest to shape as you go along rather than do them all at once. Pop each round into the boiling water. At first they’ll sink, then when they’re cooked they’ll bob up to the surface. Lift them out with a slotted spoon and set aside.  

Six. Once you’re gnocchi are all cooked, heat a knob of butter in a frying pan. Sauté your gnocchi to seal them (but not brown them) and add in the pesto to heat through.

Seven. Serve with grated parmesan and some sprigs of parsley. 

Recipes adapted from Great British Chefs and Good Housekeeping

*NB. When picking garlic (or any other plant for that matter) try to stick to the rule of thirds; pick a third of the plant and leave two-thirds. 

Not Quite Recipe Friday: Rhubarb and Almond Cake

words Liz Seabrook

23rd April 2016

Homebaking isn't about perfection; it's about making something to share, taking time away from a screen or just satiating that need for something sweet without spending £3.50 on a single muffin.

For this Recipe Friday, our lifestyle editor Liz Seabrook picked some rhubarb from the garden and made a birthday cake for her mum with the things she could find in the kitchen cupboards and the garden. And don't worry, she didn't mind the slightly singed sugar one bit.

You will need
150g salted butter, at room temperature

50g golden caster sugar, plus 2 tbsp

2 medium eggs

200g ground almonds

finely grated zest of 1 orange

100g Doves Farm gluten free* self-raising flour (or normal SR Flour)

1 tsp baking powder

400g rhubarb, trimmed and cut into 4cm lengths (cut in half lengthways first if very fat)

2 tbsp flaked almonds

How to: 
One. Preheat the oven 180°C, fan 160°C, gas 4. Grease a 22cm springform tin and line the base and sides with baking paper.

Two. Put the butter and sugar in a bowl and cream together with an electric whisk until pale and fluffy. Whisk in the eggs one at a time until creamy. Add the ground almonds and orange zest, sift over the flour and baking powder and mix well.

Three. Spoon half the mixture into the tin, carefully spreading it right to the edges. Arrange just under half the rhubarb on top, keeping it away from the edges of the tin. Sprinkle over 1 tablespoon of the extra sugar.

Four. Spoon over the rest of the cake mixture, then spread it to cover the rhubarb. Arrange the rest of the rhubarb on top, in a circle, filling in any gaps (keeping it away from the edges). Scatter over the flaked almonds and sprinkle with the remaining extra sugar.

Five. Bake for 1 hour until golden, cover with a tent of foil and bake for another 10-15 minutes until firm to the touch in the middle. Leave in the tin to cool before transferring to a wire rack. If not serving warm, allow to cool completely.

We recommend serving warm with a drizzle of ginger syrup and maybe some icecream! Mmmm YUM!

Recipe adapted from Sainsbury Magazine to be gluten-free using Doves Farm gluten free self raising. 

Recipe Friday: Meringue Girls Mojito Baked Alaskas

words Meringue Girls

15th April 2016

Baked Alaska is an absolute classic meringue recipe. We have given it a Meringue Girls twist by combining a zesty lime and coconut sponge with mojito sorbet and blowtorched brown sugar Italian meringue. A proper summer holiday on a plate. Don’t forget your cocktail umbrella!

You will need:

Makes 4

For the Mojito sorbet (cheats can get shop-bought from Waitrose!)

125ml fresh lime juice

4 tbsp Jamaican white rum

150g icing sugar

120ml water

zest of 1 lime

a handful of mint (roughly 20 leaves), finely slicedv

For the sponge:
170g softened unsalted butter

170g caster sugar

3 eggs

100g self-raising flour

70g desiccated coconut

juice and zest of 2 limes

For the brown sugar Italian meringue:
60g egg whites (from 2 medium eggs)

50g caster sugar

75g light brown sugar

30ml water

Equipment:
a sugar thermometer

a blowtorch

cocktail umbrellas

To make the mojito sorbet:

One. Put the lime juice, rum and icing sugar into a bowl and whisk until the sugar has dissolved. Stir in the water, lime zest and mint. Pour into an airtight container and freeze overnight. Due to the alcohol content this sorbet sets softly, so use it quickly.

To make the sponge:

One. Preheat the oven to 170°C/gas 5. Butter a large baking tin (approximately 24cm x 18cm) and line it with non-stick baking paper.

Two. In a large bowl or using a stand mixer, beat the butter and sugar together until light and fluffy. Add the eggs one at a time – the mixture may start to look split, but don’t worry. Add the flour, coconut, lime juice and zest and fold gently until you have a smooth batter. Pour the mixture into your baking tray and smooth the surface with a spatula or the back of a spoon, then bake for about 20 minutes, until the cake is golden and springs back when pressed.

Three. Run a knife around the edge of the tin, turn the cake on to a cooling rack and leave to cool completely. Once completely cool, cut out 8cm diameter circles from your sponge. We’ve used a cookie cutter, but a knife around a tumbler is fine.

To make the brown sugar Italian meringue:

One. Put the egg whites and 1 tablespoon of the caster sugar into the bowl of a stand mixer, fitted with the whisk attachment, or use a clean glass bowl with a hand-held whisk. Don’t start whisking yet.

Two. Put the remaining caster sugar, light brown sugar and water into a heavy-based saucepan and place over a medium/high heat. (Don’t stir, as this can cause the sugar to crystallize and you’ll get crunchy bits in your meringue!). Once the sugar has dissolved and the mixture is boiling, attach a sugar thermometer to the pan and continue to boil without stirring until the syrup reaches 120°C. Then take the pan off the heat.

Three. Now turn the mixer on to high speed and whisk the egg whites until stiff peaks form. Reduce the speed to low and carefully pour in the hot sugar syrup in a very slow steady stream. Be careful to add the syrup directly to the egg whites, without it touching the side of the bowl or the whisk on the way down, otherwise it will cool before it hits the eggs. Once all the syrup has been added, turn the mixer on to high speed and keep mixing until the sides of the bowl feel cool.

To assemble:

Finally. Place your four sponge circles in your desired serving dish. Using an ice cream scoop, place a perfect scoop of mojito sorbet on each sponge circle. Working quickly, cover the sorbet and sponge with Italian meringue – a mini palette knife is useful here. Blowtorch to a golden caramel colour and serve immediately with a cocktail umbrella.

If the above sounds like too much effort, head down to Broadway Market to buy ready made sweet treats. Original recipe and image from the MG’s latest book Meringue Girls: Everything Sweet out now and published by Square Peg.

Recipe Friday: Edible Flowers Lollipops with Sexy Sherbert

This month's Recipe Friday is hosted by the Meringue Girls, and for the second installment in the series we'll be making edible flowers lollipops with sexy sherbet!

We’ve opted for pansy lollies, but you can use any edible flowers you can get your hands on – such as violets or roses. This is an incredibly quick and easy recipe that creates a tongue-twisting trip down Memory Lane.

MAKES 18

For the edible flower lollipops:

· 225g granulated sugar

· 100ml glucose syrup

· 60ml water

· a couple of drops of natural passion fruit essence (or any other essence you desire!)

· edible flowers

For the sherbet:

· 300g icing sugar

· 1 tbsp citric acid

· 1 tsp bicarbonate of soda

· 3 tbsp freeze-dried fruit pieces (e.g. raspberry or strawberry)

Equipment:

· a pastry brush

· a sugar thermometer

· lollipop sticks

Combine the sugar, glucose syrup and water in a saucepan over a medium heat and stir until the sugar dissolves. When it comes to the boil, dab a pastry brush into a cup of tap water and brush down the sides of the pan just above the boil line to remove any sugar crystals that have formed.

Attach a sugar thermometer to the pan and allow the mixture to continue to boil, without stirring, until it reaches 154°C. Immediately remove from the heat. Add a few drops of your chosen flavouring and stir to combine.

You need to work quickly to form your lollies. On a silicone mat or a sheet of baking paper, put a blob of sugar syrup down and use the back of a spoon to smooth it out into a circular shape. Place your lollipop stick, then put an edible flower on top. Finish by covering the flower completely with more sugar syrup.

Allow to cool for 30 minutes at room temperature. Wrap the lollipops individually in cellophane, tie with string and store at room temperature for up to a month. They are sticky, so keep them separate from each other.

To make the sherbet, simply whiz all the ingredients in a food processor or mix together in a bowl to form a fine dust.

To serve up a sherbet fountain, fill a small shot glass with sherbet, place a liquorice stick or lollipop in the middle, and get fizzy.

Recipe Friday: Meringue Girls' Prosecco, Strawberry and Popping Candy Truffles

For this month’s recipe Fridays we are tucking into sugary treats thanks to the Meringue Girls! And to start us off we have some fizz popping truffles.

Homemade chocolate truffles are deceptively easy to make, yet so impressive. The perfect little treat for popping in your mouth when you’re sitting on the sofa, after dinner, or if you are planning a decadent high tea. Everyone’s heard of champagne truffles, but these use our fave fizzy Italian tipple – prosecco.

You will need

MAKES 25

For the truffle ganache:

280g good-quality dark chocolate (70%)

250ml double cream

50g unsalted butter

100ml Prosecco (drink the rest of the bottle while eating your truffles)

For coating:

60g freeze-dried strawberries

60g coated popping candy or normal ‘Fizz Wiz’ popping candy

One. Line a large baking tray with baking paper.

Two. Start by making the truffle ganache. Break the chocolate into squares and place in a large glass bowl. Heat the cream and butter in a saucepan over a low heat, and stir until the butter is melted. Let the cream reach a gentle simmer, then pour over the chocolate, whisking until it’s completely melted. Add the prosecco and whisk until combined. Pour the lot into a lined shallow tin and refrigerate for at least 4 hours, and preferably overnight.

Three. Mix your freeze-dried strawberries and popping candy together on a large plate and set aside.

Four. To shape the truffles, dip a melon baller or teaspoon into a cup of boiling water. Scrape up balls of the ganache, reshaping them with your hands if necessary, then drop them on to the plate of freeze-dried strawberries and popping candy*, rolling them around to get an even coverage.

Five. Repeat until you’ve used all the ganache. Place the truffles on a baking tray lined with baking paper and chill in the fridge for about 30 minutes before enjoying.

*Coated popping candy doesn’t absorb the moisture of the truffles, so the ‘POP’ stays until you bite into them. Uncoated ‘Fizz Wiz’ works well, but absorbs the moisture, so these are best eaten quickly. If you prefer to keep your truffles simple, just roll them in good-quality cocoa powder.

Original recipe and image from the MG’s latest book Meringue Girls: Everything Sweet out now and published by Square Peg.

Recipe Friday: Bread Ahead's Simnel Marzipan Moments

You will need

(Makes around 38 bite size balls)
250g ground almonds

125g caster sugar

125g icing sugar

2 tsp ground mixed spice

pinch of ground cinnamon

pinch of ground cloves

¼ tsp almond extract

¼ tsp vanilla extract

1 whole egg

1 egg yolk

1 tsp of lemon juice

1 tsp Honey

1 tsp Brandy

One. In a large bowl place the ground almonds, caster sugar, icing sugar and spices, then mix together.

Two. In a seperate bowl beat the whole egg, yolk, extracts, lemon juice, honey and brandy together and pour onto the almond mix and mix together well.

Three. Once the paste is made, roll out in around 15g balls nice and smooth (you should get around 38).

Four. Then using the blow torch or under a grill, singe the marzipan moments to a golden singe brown.Don’t be scare to burn them a little as it really adds to the depth of flavour which balances the sweetness and it is delicious.