issue 44

Time travel: a visit to the Bauhaus

Photos:  Frances Ambler

In our late summer issue, we share four different stories of time travel. Frances Ambler wrote about what it was like to spend a night at the Bauhaus in Dessau, Germany.

"I was standing in front of the then ultra-modern building… Its architecture represented to me the beginning of a new era.” So wrote student Hannes Beckmann on arriving at the Bauhaus in Dessau. Walter Gropius designed the building to match this ambitious art school, a vision of soaring glass, proclaiming its own name in huge letters down its side. Its photograph was circulated around the world – at first a symbol of German creativity and forward thinking; later, after its closure by the Nazis, a symbol of a lost era.

As I stood there, in grey drizzle, it wasn’t quite living up to this promise. I was staying overnight in one of the 28 studio rooms where students had worked and slept, part of my research for my book, The Study of the Bauhaus. The room had the single bed, fitted cupboards and sink familiar from student halls – here, however, the furnishings revealed the creativity of its former inhabitants: the tubular metal furniture devised by Marcel Breuer seen in a set of nesting tables; the modernist patterns promoted by the weaving workshop present in a bedspread devised by Gunta Stölzl. Echoing the pattern of my own student life, I crawled into bed with my phone, distracting myself with the hum of contemporary online life.

If I went to bed in a 21st-century fug, I woke up in the optimism of the 1920s. Bright blue sky had taken the place of the grey. The huge desk by the window suddenly looked inviting. I stepped onto the balcony, and looked over the surrounding town in a new light.

The day opened up a Bauhaus experience bigger than the room: what had been the student canteen, auditorium and gym, the spaces where workshops once whirred with activity. On a tour, we stopped in one of the studio rooms, made up as it would have been then. It had belonged to Marianne Brandt, who had found her calling in the metal workshops, inventing lamps, ashtrays and her now-famous tea set, which today sell for thousands of pounds. It was right next door to the room where I’d spent the night.

Looking at Brandt’s record player, I understood my earlier disconnect. The many snapshots taken by the students themselves show them in and out of each others' rooms, leaning across their balconies and throwing impromptu parties – rows of cakes spread across the nesting tables, grinning attendees squished onto the single bed. They experimented and learnt together; they also gave friendship.

Right wing opponents forced the Bauhaus to close in Dessau in 1932, and it moved, temporarily, to Berlin before finally closing the following year. Its students spread out around the world. We tend to hear the names of the lucky ones, such as Josef Albers or Marcel Breuer, who forged new lives in America. Others struggled in Germany, their careers never reaching such dizzy heights. Some suffered in concentration camps. The building itself was damaged in bombing, only fully opening for visitors four years ago.

But the Bauhaus was always more than its building. It was about the people and their desire and determination to build a better world – a spirit that blazed as brightly as that day’s blue sky.

The Story of the Bauhaus is published on 11 October (Ilex Publishing). You can pre-order a copy here. And enjoy three other stories of time travel in our late summer issue.

An ode to stationery

Stationary Image for social.jpg

words: Jane Audas

As August melts away, cooler weather will bring leaf kicking and the joy of layered dressing in knitted things. This is also the time of year many are preparing to go back to school or college, so buying a new rucksack, pen, paper and eraser. That might be a tad romantic in our time of computers. But even after being out of formal education for decades, I still get the urge to go shopping for a new protractor set when September comes.

I love stationery. The old-fashioned gummed envelope, blue marbled notebook sort. And the washi tape, stickers and improbably cute Japanese cartoon character sort. I like a wall of pens with scribbled on ‘test’ notes lodged sporadically in them. And to find the thinnest nib is my self-appointed, happily accepted, lifelong challenge. So far, I am at 0.03mm.

To my joy, there now exist beautifully created stationery shops. The sort of shop where a notebook with an elastic band around it will cost a pretty penny. But I think something I use every day (as I do a notebook) is a special buy and worth the cost. With age comes the knowledge that four or five cheap tacky notebooks can’t replace the one that really pleases your hand and heart.

I can also be found in more ordinary stationery shops. On holiday I’ll search out both the just-so stationery emporium and the (hopefully slightly dusty) office stationery shop. There I will hopefully find multi-size binders and clear plastic poppered wallets, old paper accounting books with blue carbon copy paper in-between their sheets. If I get lucky there will be a selection of tiny cardboard boxes containing paperclips, drawing pins, small bulldog clips and the like. And if the stars are really aligned, the shop will sell cardboard tubes of different sizes.

A love of stationery began early. As a child I had a Galt Toy post office. This came in a bright red cardboard container, shaped like an old-fashioned post box. Inside bits of paper, a franking stamp and ink pad, gummed stickers, stamps and mini envelopes combined to keep me quiet running a post office from my bedroom.

Growing up with recurring autumnal needs for new stationery set me up for a life in paper and envelopes. One preferably topped off with a tin containing a rainbow of 50 assorted felttip pens. Comedian Victoria Wood had the right of it when she said: “I didn’t want a boyfriend, I wanted a 13-colour biro.”


Our friends at Papier love stationery as much as we do, so they are offering 15% off personalised stationery using code OHCOMELY15 at papier.com. Offer expires 30 September 2018, valid on notebooks, notecards, sketchbooks and planners only

Issue 44 playlist: late summer

Illustration:  molly egan  

Illustration: molly egan 

No matter where you are, whatever the weather, there are certain sights, smells and sounds that always conjure up those summers that seemed to last forever. This playlist celebrates those songs that pull you back through the past. It’s the soundtrack to staying out in the park till sundown, sitting out chatting with your friend into the early hours, perhaps a gentle doze in the sunshine. While the heat of summer may be beginning to die down, they’re the kind of memories that last forever. 

Take a listen to our late summer playlist here

Mordant recipe: mineral-based mordant alum and cream of tartar

Photo: Kim Lightbody

Photo: Kim Lightbody

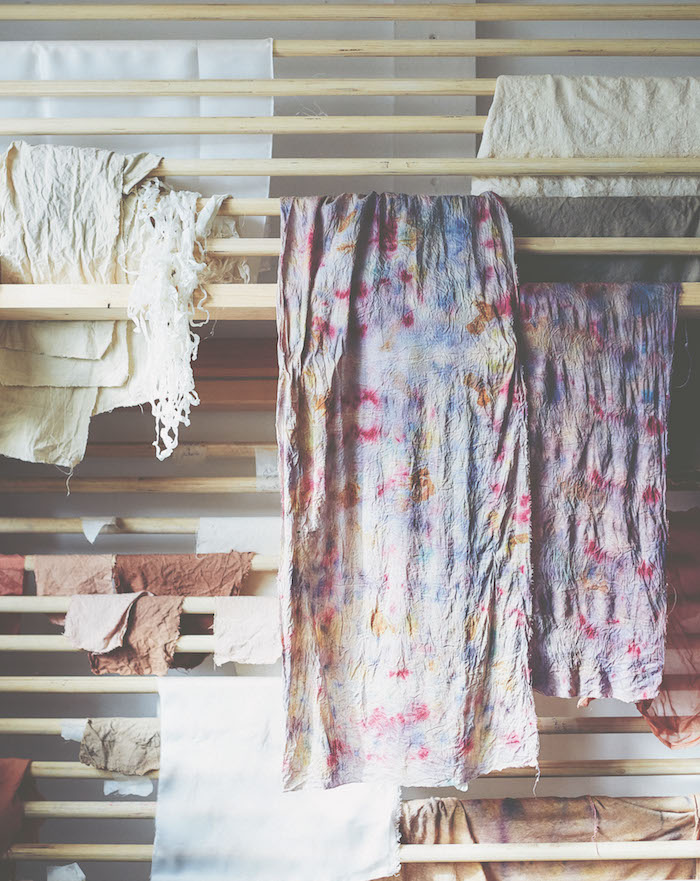
Turn to page 106 of the late summer issue of Oh Comely to read Babs Behan's tutorial on bundle dyeing with natural materials. But before you begin to dye, you'll need to mordant your fabric – this will help the colour stay on your fabric and not come off in the wash. This mordant recipe is also courtesy of Babs. 

Mineral-based mordant alum and cream of tartar

Alum (potassium aluminium sulphate) helps to improve the colourfastness of dyes, so they are less likely to fade from light and washing. It also helps to brighten colour tones. It is considered non-toxic in small quantities, so it is safe to use, but it should not be inhaled, ingested or come into contact with skin as it can cause irritation. You can buy it online or from Asian or South American food stores. Use the exact quantities of alum required for the weight of your fibre, so that it’s all absorbed by the fibre and not wasted. Always work in a well-ventilated area and wear gloves, dust mask and eye protectors when working with alum-based mordants. Safety bit over, let’s begin….

You will need:

  • Fibre (washed, scoured and dry – see the instructions in the magazine)
  • Scales
  • Alum
  • Cream of tartar
  • 2 large pots, with lids
  • Measuring spoons
  • Heatproof jar
  • Long-handled spoon
  • Small lid or plate (optional)
  • pH-neutral soap

Now:

1 Weigh the fibre after it has been washed, scoured and dried. Use 8% of the weight of the fibre in alum, and 7% of the weight of the fibre in cream of tartar. You should weigh the fibre and calculate the correct weight of alum and cream of tartar to use before you begin preparing the mordant.

2 Place the fibre in a large pot of water and allow it to soak for at least one hour, or ideally 8–12 hours/overnight, so that the fibre is pre-wetted.

3 Fill a pot with room-temperature water. The pot should be large enough to contain the fibre you want to mordant and allow enough water for it to be covered and move around freely.

4 Measure out the cream of tartar into a heatproof jar and add enough boiling water for it to dissolve completely when stirred. Then add this to the pot of water, stirring with a long-handled spoon to mix it in.

5 Measure out the alum into the heatproof jar and add enough boiling water for it to dissolve completely when stirred. Then add this to the pot of water, again stirring with a long-handled spoon to mix it in.

6 Add the pre-wetted fibre to the mordant solution. Bring the solution to a simmer, cover with a lid and simmer for one hour.

7 Stir gently and occasionally with a long-handled spoon. Be sure to tease out any air bubbles trapped under the fibre, as this can make it rise above the surface of the liquid where the mordant cannot reach it properly. Moving the fibre also helps to separate any areas that have been touching, or touching the side of the pot, where the mordant may not be able to reach them.

8 Turn off the heat and allow the fibre to cool in the pot overnight. Then remove the fibre from the pot and gently wring out any excess liquid.

9 Rinse the fibre with cool water, wash with pH-neutral soap and cool/lukewarm water, then rinse again to remove the soap.

10 Use the fibre in its damp state and add it to your dye bath. Or hang out the fibre to air dry somewhere warm and dry, out of direct sunlight, for later use.

Now you're ready to dye! Turn to page 106 of the late summer issue to begin. We'd love to see the results: tag us @ohcomelymag. This recipe is taken from Botanical Inks: Plant-to-Print Dyes, Techniques and Projects by Babs Behan (Quadrille).